Form Studio
A no code way to build forms and integrate them into your website.
What is Basin Form Studio?
Basin Form Studio, powered by SurveyJS Survey Creator, provides a powerful and flexible solution for building modern forms and surveys. Whether you are a developer or a non-technical user, you can easily create and manage forms with Basin Form Studio while maintaining full control over the front-end experience.
How does Basin Form Studio work?
Basin Form Studio leverages the SurveyJS to provide a seamless form creation and management experience. You can create forms using the drag-and-drop interface, configure logic and validation, and Basin handles hosting, submissions, spam filtering, notifications, and integrations.
Key Features
- Drag-and-drop form designer
- Conditional logic and branching
- Validation and input masking
- Spam filtering
- Multi-page (wizard) forms
- Hosted forms and iframe embeds
- Themes and styling
1. Setting up Basin Form Studio
To get started with Basin Form Studio, create a Basin account. Open your project, create a new Form Studio form, and start building. Configure fields, logic, and validation as needed.
2. Styling your form
Use the Themes tab to select a theme for your form. You can also customize the theme to your liking.
3. Publishing Your Form
When your form is ready, go to the Deploy tab to view sharing options. You can embed your form as an iframe on your site, or Basin can host your form at a shareable link.
CDN one-line embed (auto-updating)
Use the CDN embed to include your form with a single script tag. This will always render the latest published version of your Form Studio form and automatically apply your configured settings (theme, redirects, CAPTCHA, autoresize, etc.). Copy the exact snippet from your form's Deploy tab.
Notes:
- The snippet above uses placeholders. Use the CDN URL provided in your
Deploytab. - The CDN embed sets up the iframe for you, and keeps it updated so changes you make in the Studio are reflected in the embed immediately without needing to redeploy your site.
- You can place multiple forms on a page by including multiple script tags (one per form).
Additional Configuration
Adding reCAPTCHA to your Form
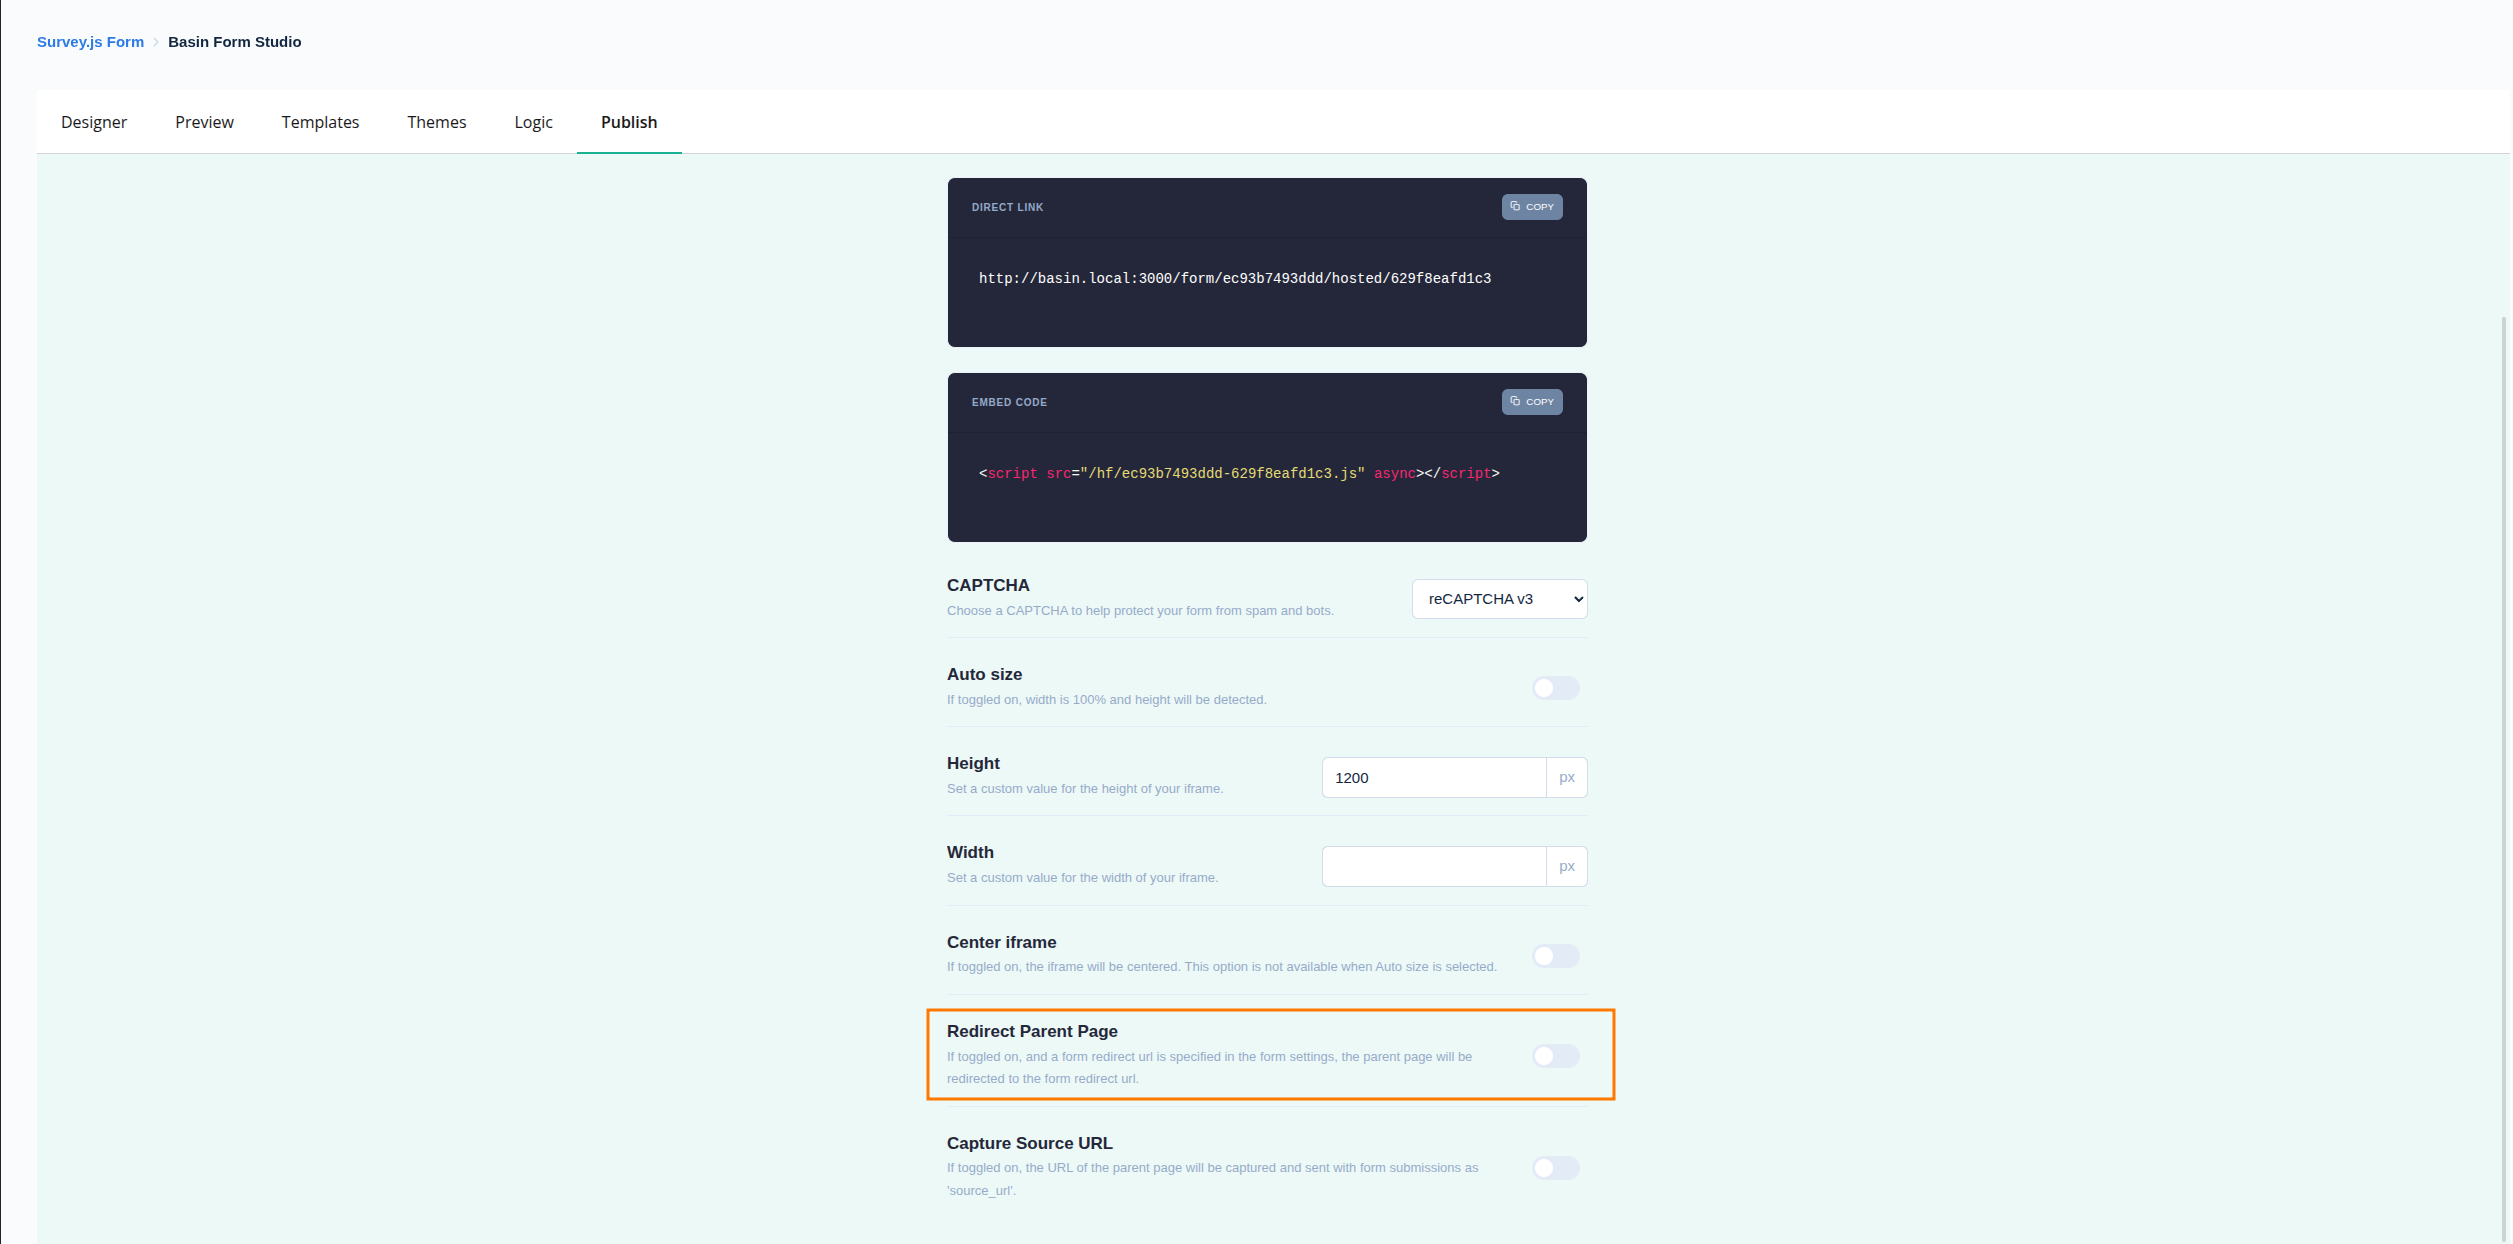
To add reCAPTCHA, simply select the reCAPTCHA option in the Deploy tab. No keys are required; Basin automatically manages them. Choose when the reCAPTCHA should trigger (on submit or on load).
Configuring Redirects
Configure redirects within the frame or redirect the parent page after submission. Use the share page to generate iframe code and optional JavaScript that you can copy and paste into your site.
TrustedForm & Jornaya Compliance Widgets
Form Studio includes dedicated drag-and-drop widgets for lead generation compliance. These widgets help you meet TCPA (Telephone Consumer Protection Act) requirements and provide proof of consent for your leads.
What Are These Tools?
TrustedForm provides independent, third-party documentation that a consumer submitted their information on your form. It captures a certificate with:
- Screenshot of the form at the moment of submission
- Timestamp and session data
- Proof that consent language was displayed
Jornaya LeadID tracks the consumer journey across your landing pages and forms, providing:
- Unique lead identifier for each submission
- Session tracking across multiple pages
- Fraud detection and lead quality signals
Both services are commonly required by lead buyers in industries like insurance, mortgage, solar, and home services.
Setting Up TrustedForm
- Add the TrustedForm Widget
- Open your form in Form Studio
- In the toolbox, find the TrustedForm widget
-
Drag it into your form (it can be placed anywhere - it's invisible to users)
-
No Additional Configuration Needed
- Basin automatically loads the TrustedForm script
- Certificate URLs are captured with each submission
-
Data is included in webhooks and available in submission details
-
Accessing TrustedForm Data
- The
xxTrustedFormCertUrlfield is automatically added to submissions - Use this URL in your webhooks to send to lead buyers
- Available as a merge tag:
{{xxTrustedFormCertUrl}}
Setting Up Jornaya LeadID
- Get Your Campaign Script
- Log in to your Jornaya account
- Navigate to your campaign settings
-
Copy your campaign-specific JavaScript snippet
-
Add the Jornaya Widget
- Open your form in Form Studio
- Find the Jornaya widget in the toolbox
-
Drag it into your form
-
Configure the Widget
- Click on the Jornaya widget to open settings
- Paste your Jornaya campaign script into the script field
- Save your form
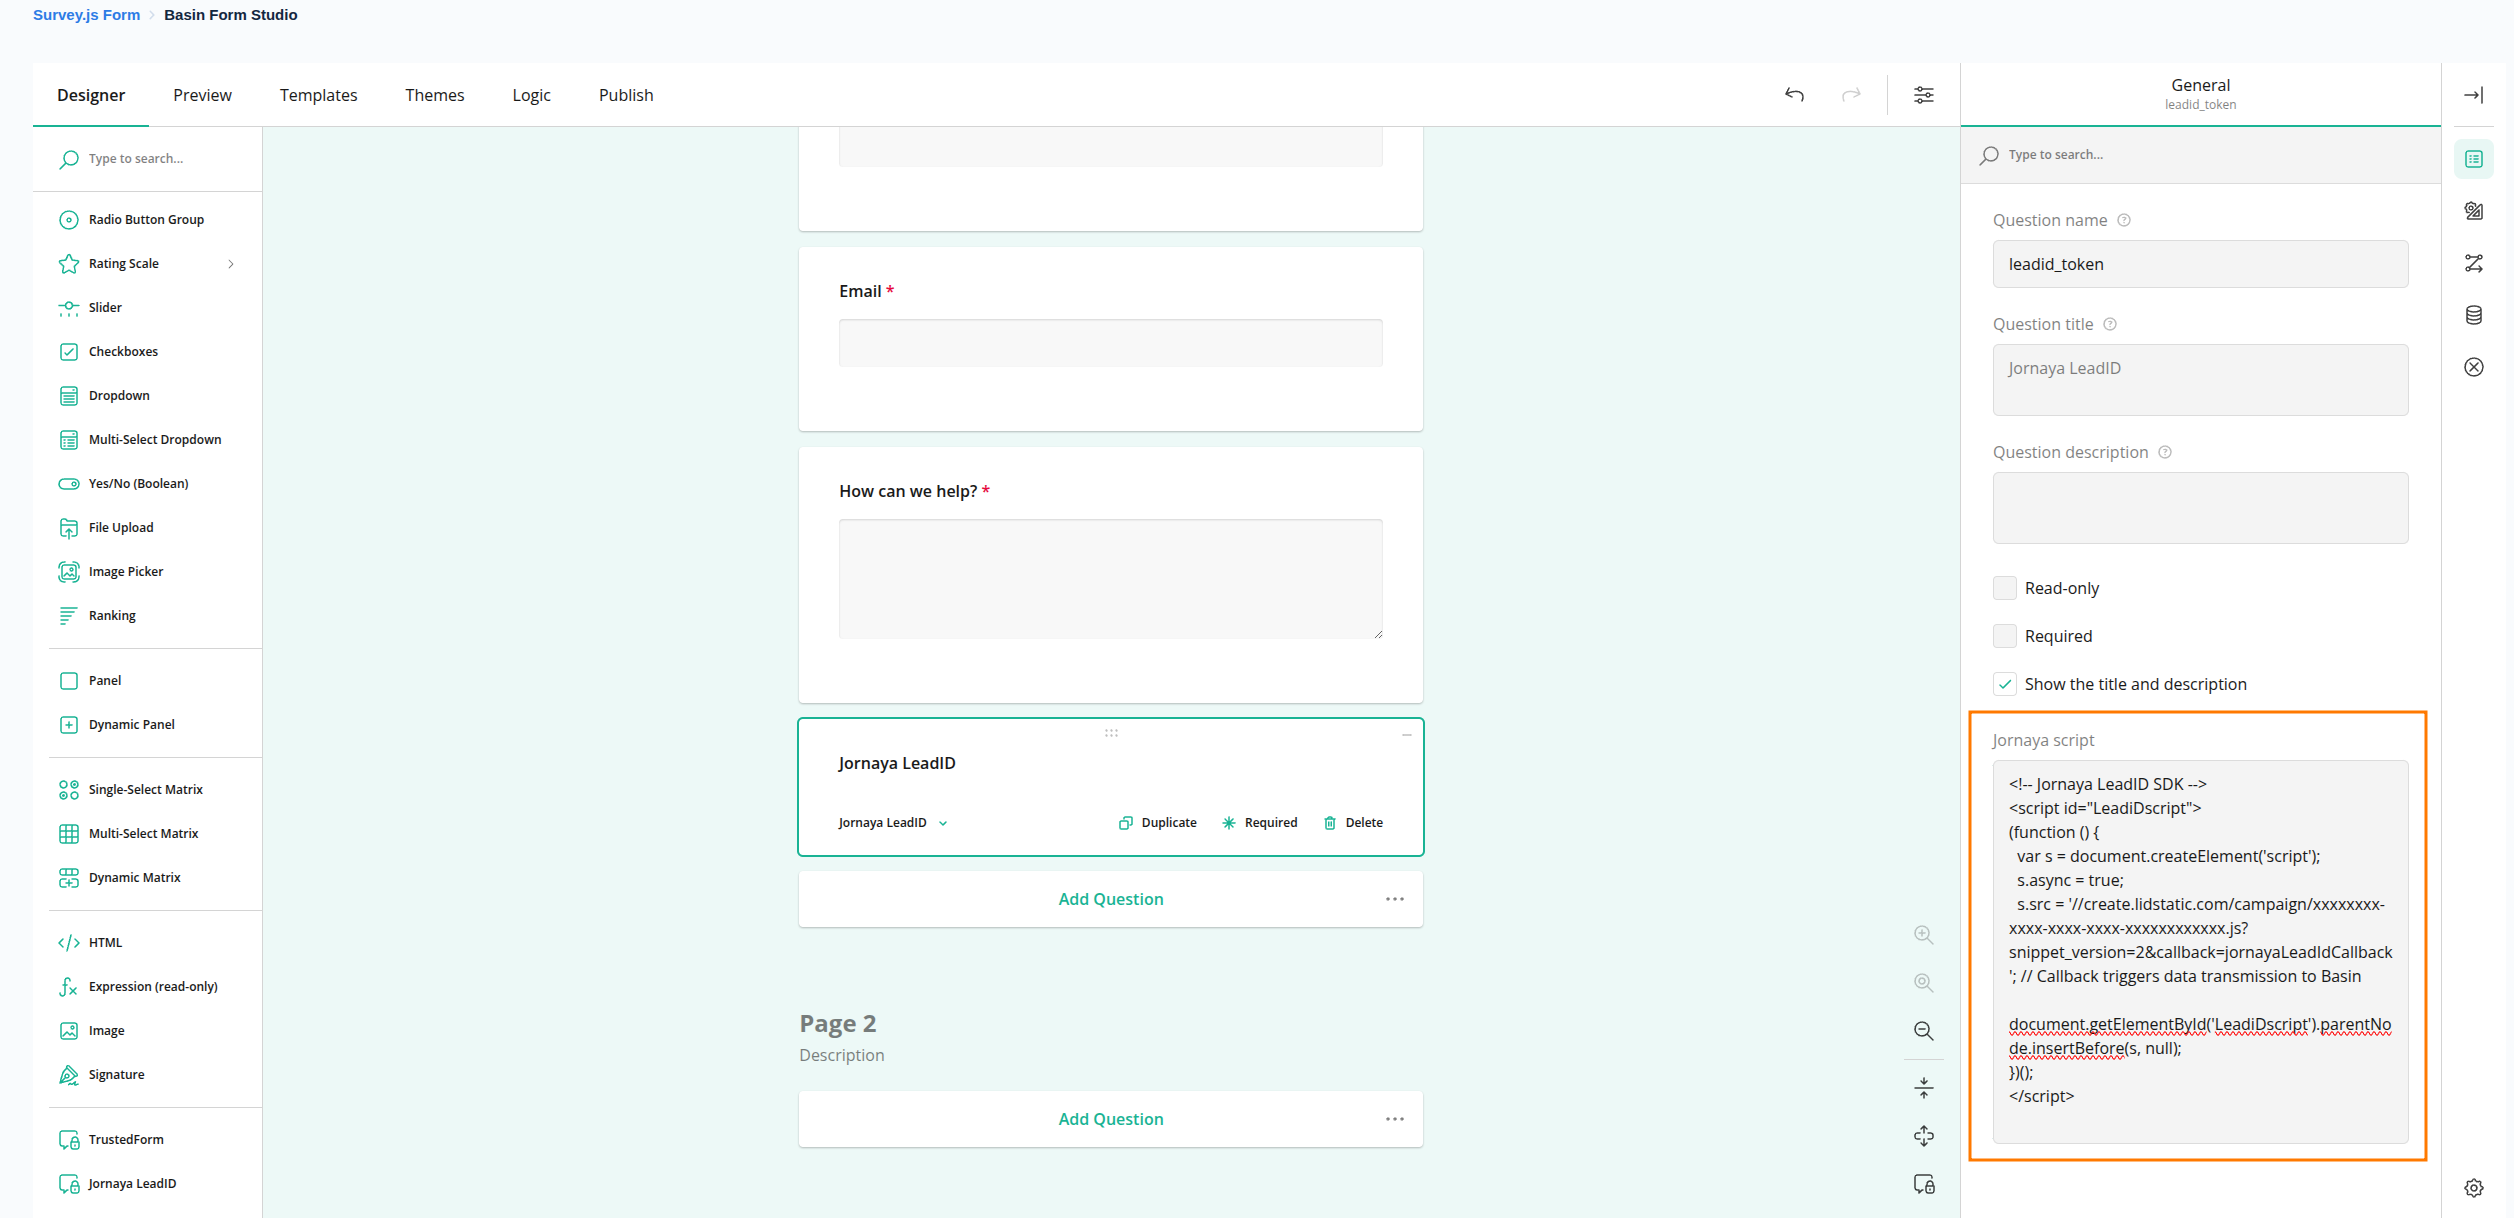
- Accessing Jornaya Data
- The
leadid_tokenfield is automatically captured with each submission - Use this token in your webhooks for lead verification
- Available as a merge tag:
{{leadid_token}}
How It Works
When a user submits your form:
- Basin loads the compliance scripts within the form iframe
- Scripts generate their respective tokens/certificates
- These values are captured as hidden fields
- Submission includes all compliance data
- Webhooks receive the complete payload with compliance tokens
Benefits of Using Form Studio Widgets
| Approach | Setup Complexity | Maintenance | Works in iFrames |
|---|---|---|---|
| Form Studio Widgets | ✅ Simple drag & drop | ✅ Automatic | ✅ Yes |
| Manual Script Integration | ⚠️ Requires coding | ⚠️ Manual updates | ⚠️ Requires workarounds |
Compatibility
- ✅ Hosted forms (direct link)
- ✅ iFrame embeds
- ✅ CDN one-line embed
- ✅ All Basin deployment methods
Troubleshooting
Certificate/Token Not Appearing:
- Verify the widget is present in your form
- For Jornaya, check that your script is correctly pasted
- Ensure the form was saved after adding the widget
- Test with a real submission (not preview mode)
Lead Buyer Rejecting Certificates:
- Verify the certificate URL is valid by opening it in a browser
- Check that your TrustedForm account is active
- Ensure the certificate hasn't expired (typically valid for 72 hours)
Testing Compliance Widgets
Always test your forms with real submissions (not preview mode) to verify compliance data is captured correctly. Preview mode may not fully initialize the third-party scripts.
Capture Parent Page URL in Iframe
To capture the parent page URL in the iframe, simply select the Capture Source URL option in the Deploy tab. This will add a hidden field to your form that will capture the parent page URL.
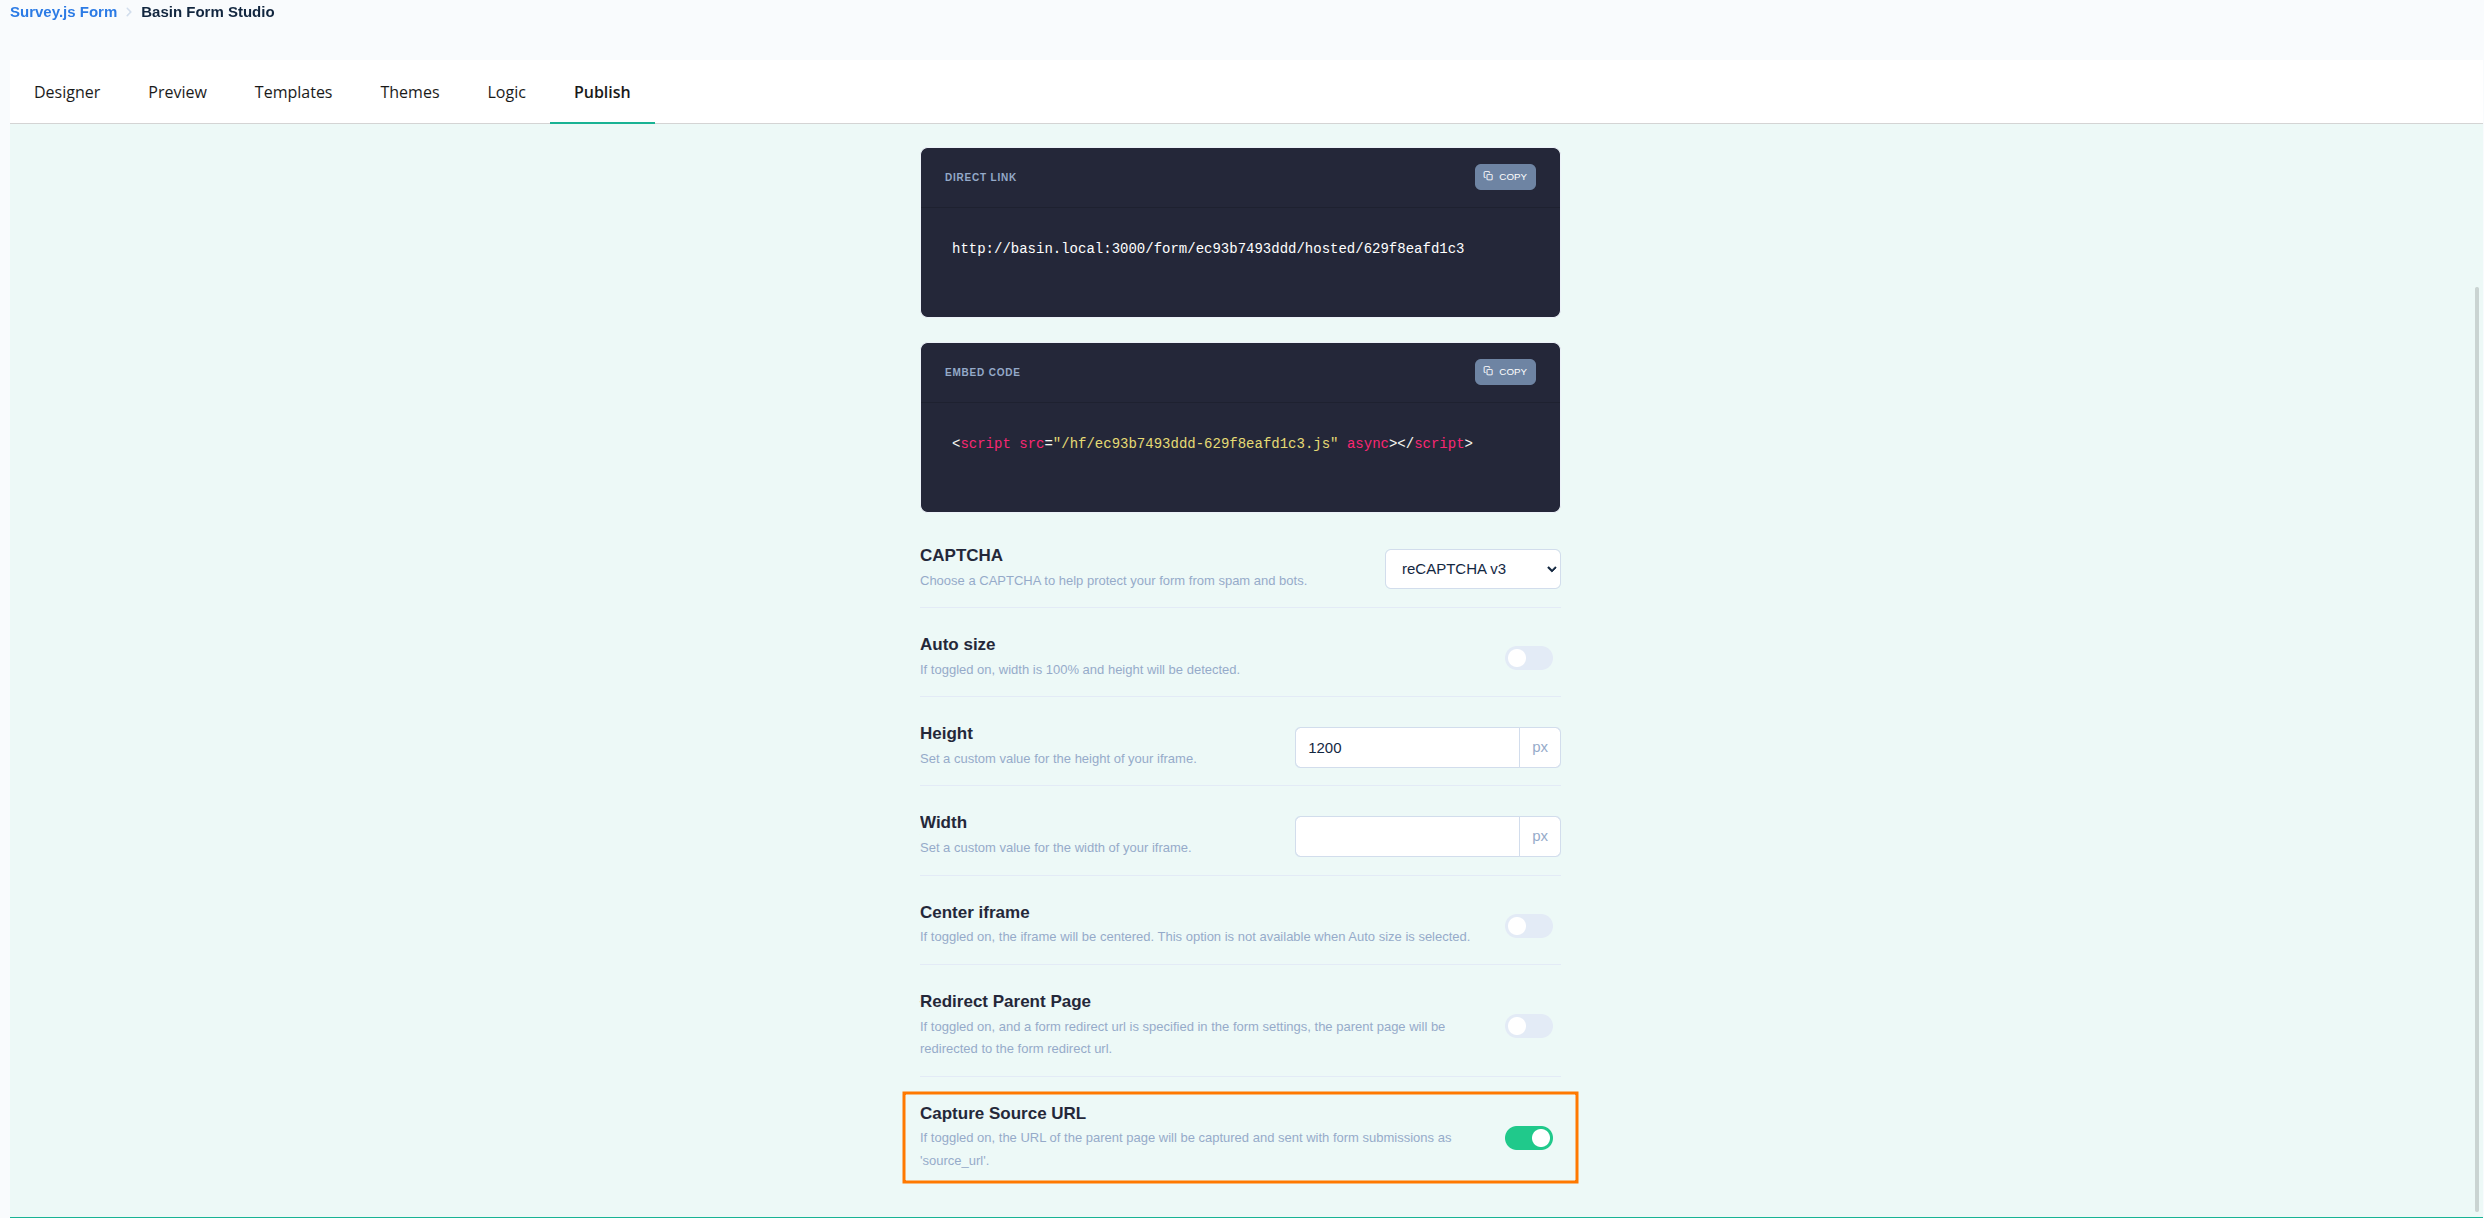
Notes:
- This will add a hidden field to your form that will capture the parent page URL.
- This will work with hosted forms, iframe embeds, and the CDN one-line embed.
Adding Additional Data to Form Submissions
Send extra context from the parent page to the embedded form using the postMessage API. This lets you include metadata like user preferences, page info, or tracking data with each submission.
How It Works
- The parent page sends a payload to the iframe using postMessage.
- Basin Form Studio captures this data and includes it with submissions.
- No additional configuration is needed in the Studio.
Example Implementation
Add the following JavaScript to the parent page where the iframe is embedded, choose the action flag addHiddenFields so your key/value pairs are added as hidden fields:
<script>
  // Parent page
  window.addEventListener('load', () => {
    const iframes = document.querySelectorAll('iframe.basinIframe');
    const payload = {
      action: 'addHiddenFields',
      key: 'value',
      key2: 'value2'
    };

    iframes.forEach((iframe) => {
      iframe.contentWindow?.postMessage(payload, '*');
    });
  });
</script>
Key Points
- Automatic integration: Data sent via postMessage is included with the submission without modifying the form.
- Use the action flag: Include
action: 'addHiddenFields'so your key/value pairs are added as hidden fields. - Custom data: Add any keys relevant to your use case (e.g., campaignId, utm params).
- Timing: Run on page load to ensure the iframe is ready to receive the message.
Analytics & GTM Event Tracking
Basin Form Studio emits lifecycle events that you can use to fire analytics tags, GTM triggers, or any custom tracking code.
Events Fired
| Event | Fires when |
|---|---|
basin_form_view |
The form has loaded and is ready |
basin_form_start |
The user focuses a field for the first time |
basin_form_page_change |
The user navigates to a new page (multi-page forms) |
basin_form_submit |
The user submits the form |
All events have this shape:
The basin_form_page_change event includes two additional fields:
{
  "action": "basinEvent",
  "event": "basin_form_page_change",
  "formUuid": "...",
  "hostedFormUuid": "...",
  "currentPage": 2,
  "totalPages": 3
}
Google Tag Manager
Using the GTM Tracker Widget (Recommended)
The easiest way to connect your form to GTM is with the built-in Google Tag Manager widget in the form builder.
- In the form builder, find Google Tag Manager in the toolbox and drag it onto your form. It will be invisible to users.
- In the property panel, enter your GTM Container ID (e.g.
GTM-XXXXXXX). - Leave Send Events To Embedding Page checked (the default).
That's it. Basin will automatically load your GTM container on the page embedding the form and forward all Basin events into its dataLayer. No manual bridge tag or listener code needed.
How the toggle works:
| Setting | Behaviour |
|---|---|
| On (default) | GTM is injected on the embedding page. Events fire in the parent page context with correct URL, cookies, and campaign attribution. Recommended for iframe embeds. |
| Off | GTM is injected directly inside the form. Events fire from the Basin URL. Useful for forms accessed via direct link rather than an iframe embed. |
Avoid double-counting
If your embedding page already loads the same GTM container independently, turn the widget off or remove the widget — otherwise events will fire twice.
Setting Up GTM Triggers
Regardless of which approach you use, create Custom Event triggers in your GTM workspace for each event name:
| GTM Trigger (Custom Event) | Basin event |
|---|---|
basin_form_view |
Form loaded |
basin_form_start |
First field focused |
basin_form_page_change |
Page navigation |
basin_form_submit |
Form submitted |
GTM trigger names
Use a single regex trigger (basin_form_.*) to match all Basin events at once, then attach different tags to each one as needed.
You can also use Data Layer Variable lookups on formUuid and hostedFormUuid to target specific forms within the same GTM container.
Other Analytics Platforms
For non-GTM platforms, listen for basinEvent messages directly on the embedding page:
<!-- Segment -->
<script>
  window.addEventListener('message', function(event) {
    if (!event.data || event.data.action !== 'basinEvent') return;
    analytics.track(event.data.event, {
      formUuid: event.data.formUuid,
      hostedFormUuid: event.data.hostedFormUuid
    });
  });
</script>
Related Features
- Basin Chat - Use Form Studio forms as call-to-action buttons within Basin Chat widgets
- HTML Form Backend - Alternative approach using your own HTML forms
- BasinJS - JavaScript helper for enhanced form functionality
- AI Form Generator - Generate form schemas using AI
- Spam Protection - Configure CAPTCHA and spam filters for your forms
- Standard Information - Auto-generate Form Studio forms from SI schemas