Submission Tags and Rules
Automatically categorize submissions with AI-powered tags and trigger custom actions based on submission characteristics.
Paid Feature
This feature is only available on the Premium plan and above. Free, Basic, and Standard users will need to upgrade to use this feature.
Overview
Basin's submission tags and rules system allows you to automatically categorize your form submissions and trigger specific actions based on those categories. Using AI-powered analysis, submissions can be automatically tagged based on criteria you define, and rules can then fire webhooks or send emails when submissions match specific tag combinations.
This powerful automation system helps you:
- Automatically categorize submissions using AI-powered tag assignment
- Route submissions to different teams or workflows based on their tags
- Trigger custom webhooks for submissions that meet certain criteria
- Organize your submission data for better lead management and analysis
Video walkthrough
Setting Up Submission Tags
Defining Lead Tags
Tags are defined in your Lead Agent settings. These tags serve as categories that the AI can assign to incoming submissions based on the tag name and optional description you provide.
To set up submission tags:
- Navigate to your form dashboard
- Go to Lead Agent settings
- Define your lead tags with descriptive names and, if desired, descriptions
- The Lead Agent will use these definitions to automatically assign relevant tags to new submissions
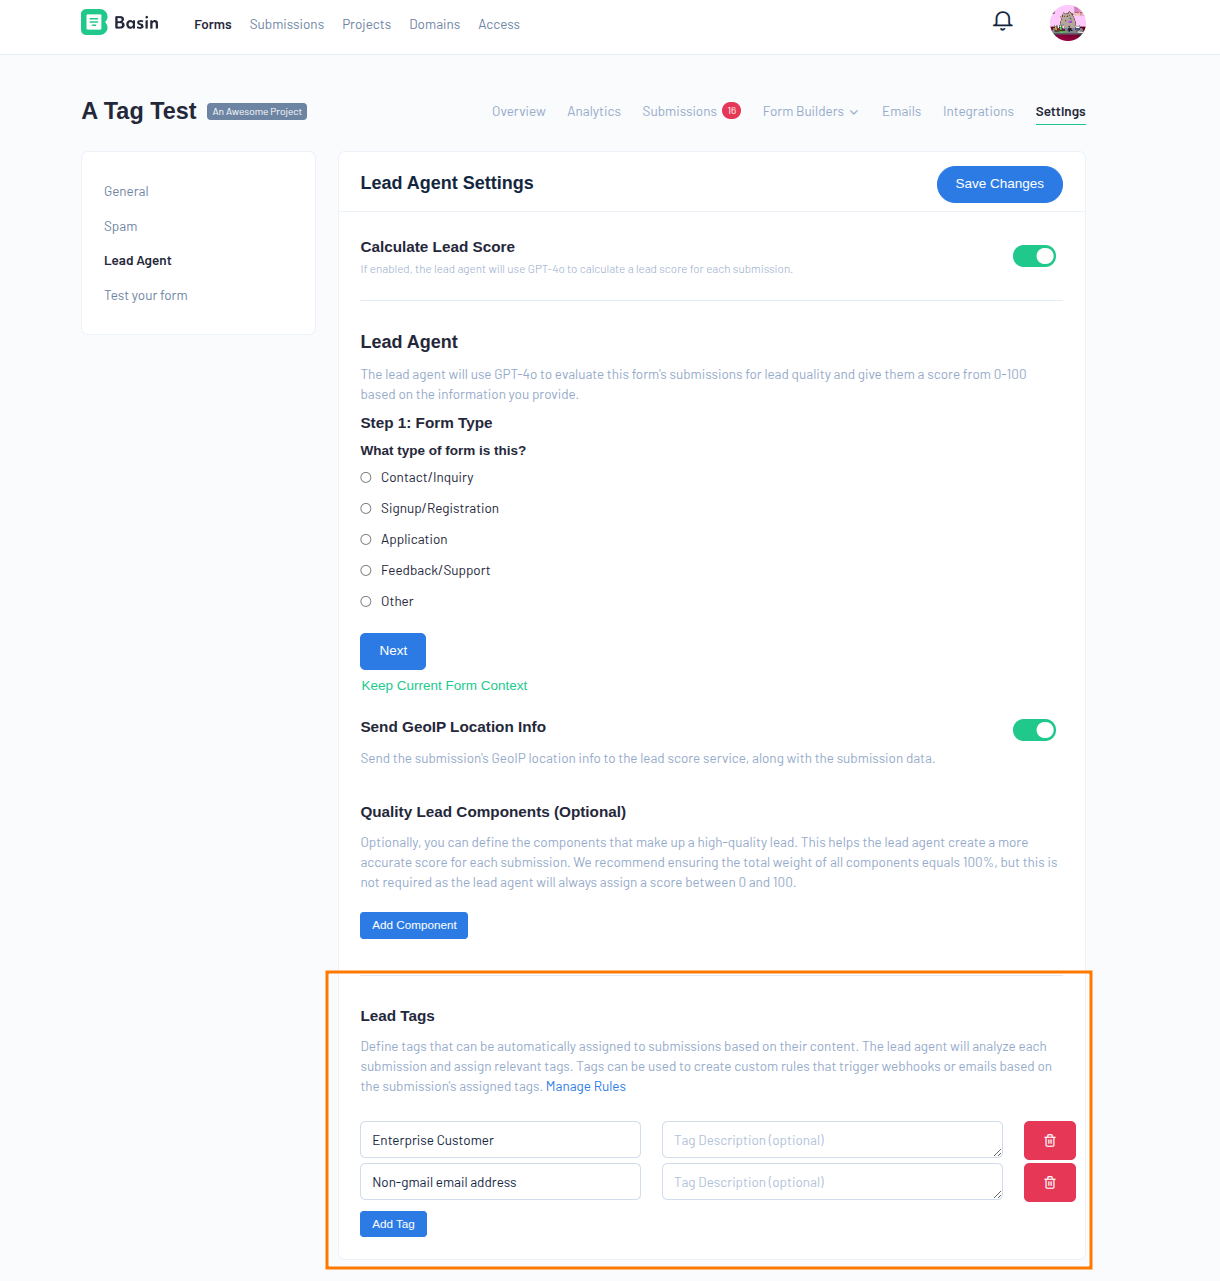
Tag Naming Best Practices
Use clear, descriptive tag names like "High-Value Lead," "Support Request," or "Product Inquiry." The more specific your tag names and descriptions, the more accurately the AI can assign them.
Automatic Tag Assignment
When new submissions come in, the Lead Agent analyzes the submission content and automatically assigns relevant tags based on:
- Tag name - The AI considers what the tag represents
- Tag description - Additional context you provide helps improve accuracy
- Submission content - Form fields, values, and overall context
Manual Tag Assignment
You can also manually assign or modify tags on submissions after they've been processed:
- Open any submission in your dashboard
- Look for the tags section
- Add, remove, or modify tags as needed
- Changes are saved automatically
This is useful for:
- Adding tags based on follow-up information
- Organizing historical submissions
Creating Rules
Rules allow you to automatically trigger actions when submissions receive specific tag combinations. Each rule can fire webhooks, send emails, or both.
Rule Configuration
To create a new rule:
- Navigate to Rules in your form dashboard
- Click Create New Rule
- Define your tag conditions (AND/OR logic)
- Configure your actions (emails and/or webhooks)
- Save and activate the rule
Tag Conditions
Rules support two types of logical conditions:
AND Condition - Rule triggers only if all specified tags are assigned to the submission - Example: Trigger when a submission has both "High-Value Lead" AND "Enterprise" tags
OR Condition - Rule triggers if any of the specified tags are assigned to the submission - Example: Trigger when a submission has "Support Request" OR "Bug Report" OR "Feature Request" tags
Rule Actions
Each rule can perform two types of actions:
Email Actions
Email actions work similarly to notification emails but with enhanced targeting capabilities:
- Recipients: Define who receives the email
- Mail Template: Select from your existing email templates or create custom ones
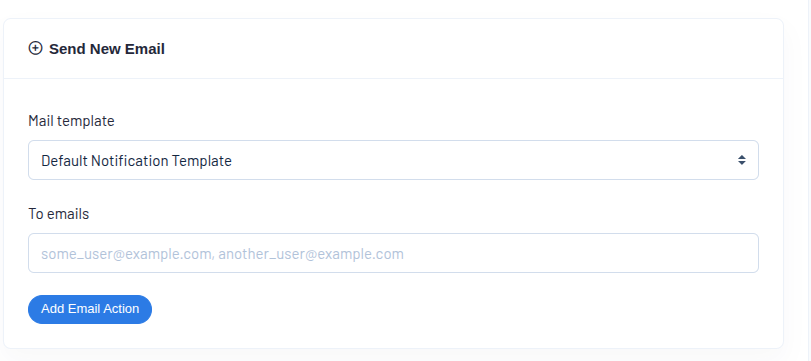
Template Selection
Unlike standard notification emails, tag-based email actions allow you to select specific mail templates, enabling you to send targeted messages based on submission characteristics.
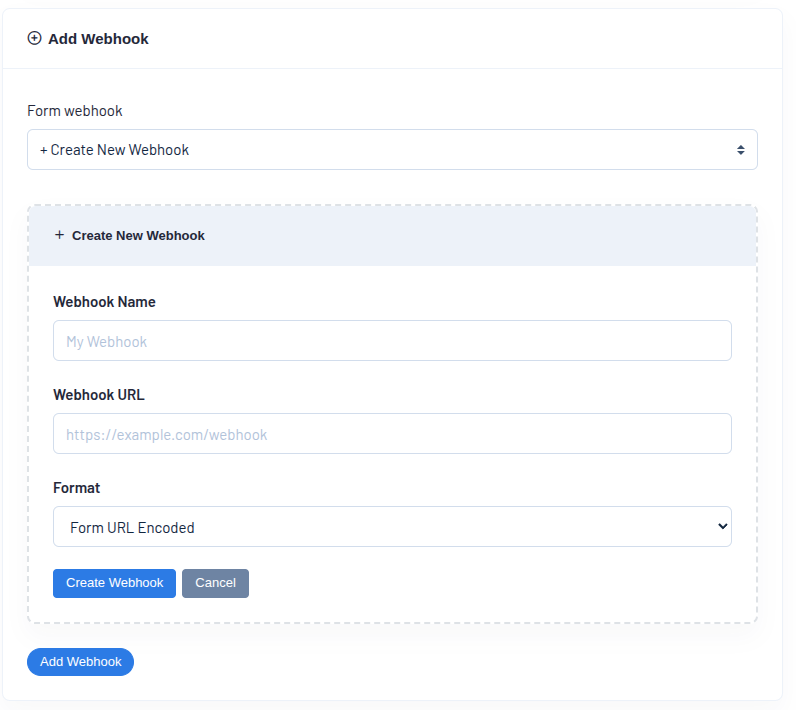
Webhook Actions
Webhook actions can utilize your existing form webhooks or create new ones specifically for tag-based triggers:
Using Existing Webhooks - Select from any webhook already configured for your form - Same payload format and authentication settings apply - Webhook will receive the tagged submission data
Creating New Webhooks - Define a new webhook URL specifically for this rule - Configure custom payload formats and authentication - Set up different endpoints for different tag combinations
Webhook Management
If you want a webhook to only fire through tag rules and not for all submissions, you can disable the form webhook in your main webhook settings.
Advanced Use Cases
Lead Routing
Set up rules to automatically route different types of leads to appropriate team members:
- Sales-qualified leads → Sales team webhook
- Support requests → Support team webhook + support team email
- Partnership inquiries → Business development team webhook
Priority-Based Processing
Create rules that prioritize urgent submissions:
- High-value prospects → Immediate notification to sales manager
- Enterprise inquiries → Custom webhook for CRM integration
- Standard leads → Standard follow-up email sequence
Content-Based Automation
Automatically handle different types of content:
- Product demos → Schedule booking webhook + demo preparation email
- Pricing inquiries → Sales team notification + pricing guide email
- Technical questions → Support team webhook + resource guide email
Managing Tags and Rules
Monitoring Performance
Keep track of how your tags and rules are performing:
- Review tag assignment accuracy in your submission dashboard
- Monitor rule trigger frequency and success rates
- Adjust tag descriptions or rule conditions based on results
Best Practices
- Start simple - Begin with a few clear tags and basic rules
- Monitor accuracy - Regularly review AI tag assignments and adjust descriptions as needed
- Test thoroughly - Use test submissions to verify your rules work as expected
- Document your system - Keep notes on what each tag and rule is designed to accomplish
Troubleshooting
Tags not being assigned correctly: - Review and refine your tag names and descriptions - Check that your Lead Agent is properly configured - Consider if submission content provides enough context for accurate tagging
Rules not triggering: - Verify your tag conditions match the actual tags being assigned - Check that your rule is active and properly configured - Check the submission logs to see if the rule is being triggered or if there are error messages - Ensure webhook URLs are accessible and email addresses are valid
Getting Started
Ready to implement submission tags and rules? Here's a quick start guide:
- Define 3-5 core tags that represent your most important submission categories
- Set up your first rule with a simple OR condition for high-priority tags
- Test with sample submissions to verify tags are assigned correctly
- Monitor and refine your system based on real submission data
- Gradually expand with more sophisticated tags and rules as needed
Tags and rules provide powerful automation capabilities that grow with your needs, helping you handle submissions more efficiently while ensuring nothing important gets missed.
Related Features
- Lead Agent - AI-powered lead scoring that works alongside tags for comprehensive lead qualification
- Webhooks - Configure webhooks to trigger based on tag rules
- Email Templates - Create custom emails that trigger from tag-based rules
- Custom Routing - Route submissions to different endpoints based on form field values